In many churches, schools and clubs, the live stream is run by whoever signed up this week. One Sunday it’s a seasoned tech lead, the next it’s a teenager who’s done it twice. The stream can still be reliable every time, as long as everyone follows the same live stream checklist.
Print this live stream checklist, tape it next to the production computer, and walk through it before every broadcast.
Before the Day: Set It Up Once
These steps are done once by your tech lead, so volunteers never have to touch them.
1. Create the live stream in Bamboo
Go to Content > Live and click Add Live Stream. Add a name, description, thumbnail and categories, then set the Start Date & Time and End Date & Time. These control the countdown and live badge viewers see.
2. Connect the encoder
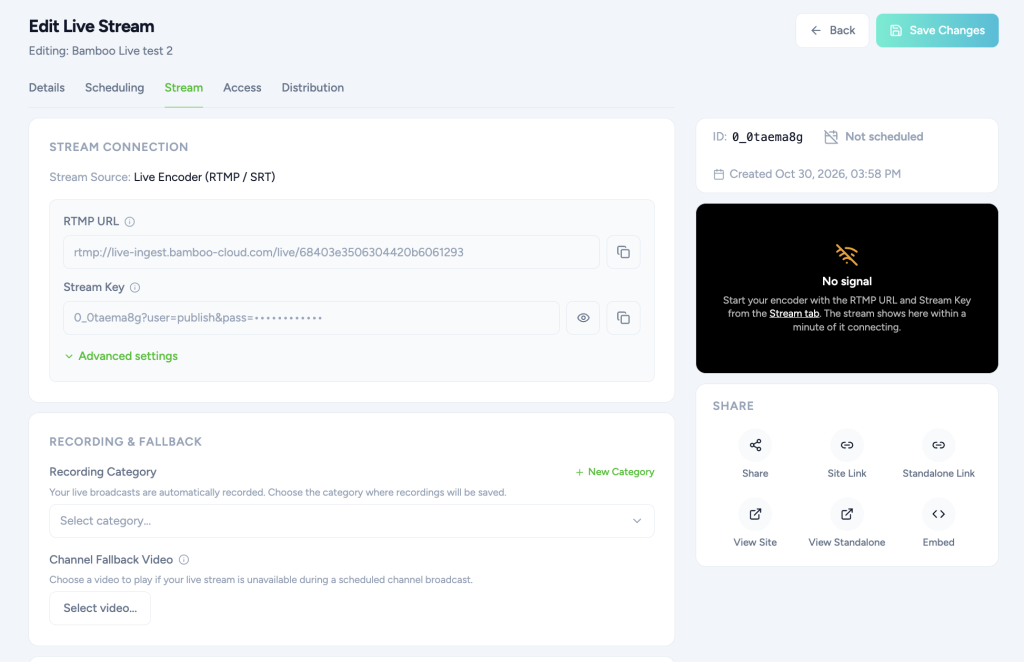
On the stream’s Stream tab, open Stream Connection and copy the server URL and Stream Key into your encoder. Bamboo works with OBS, vMix and hardware encoders over RTMP or SRT. In OBS, that’s Settings > Stream.
3. Set Recording and Fallback
Under Recording & Fallback, you can choose a Recording Category to organize your saved broadcasts. Recordings are saved automatically, even if you don’t select a specific category — they’ll go to your general recording category by default.
You can also select a Fallback Video, such as a “We’ll be right back” or “Service starting soon” loop. It plays when the stream isn’t available during its scheduled time, so viewers aren’t left staring at a blank screen.
4. Add Restream targets (optional)
If you also stream to YouTube or Facebook, add them once under Restream with + Add Target. From then on, one broadcast reaches all of them.
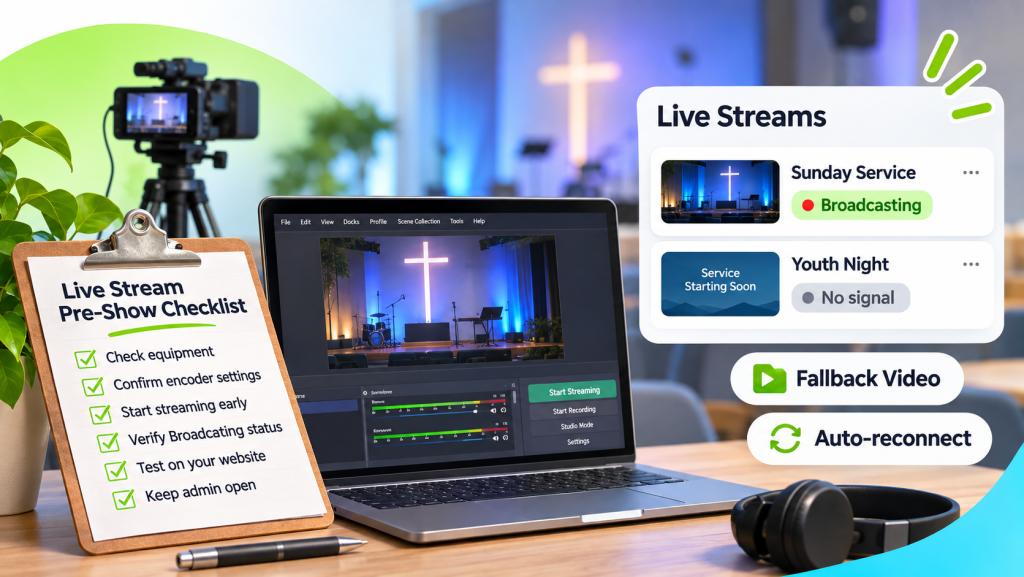
The Pre-Show Live Stream Checklist
This is the part volunteers do every time.
Equipment
- ☐ Camera and mic are powered, connected and showing in the encoder.
- ☐ The computer is on a wired internet connection if possible, with other apps closed.
- ☐ Audio levels move when someone speaks at the pulpit or stage mic.
Encoder
- ☐ The correct scene or camera is selected.
- ☐ Confirm the encoder is connected to the correct Bamboo live stream.
- ☐ Click Start Streaming a few minutes before the start time.
Bamboo
- ☐ In Content > Live, the stream shows Broadcasting. If it says No signal, recheck the encoder and stream key.
- ☐ Open your website on a phone and confirm the picture and sound are coming through.
- ☐ Keep the Bamboo admin open: bell notifications tell you when the stream starts and ends.
If Something Goes Wrong
- The signal drops: stay calm. Your Fallback Video covers the gap, and the website player reconnects automatically when the signal comes back.
- The status says No signal: check the internet cable, then confirm the stream key in the encoder.
- No sound: check the audio source in the encoder before anything else.
- Still stuck: call the tech lead. Write their number on this checklist.
After the Broadcast
- ☐ Click Stop Streaming in the encoder once the service or event ends.
- ☐ Check that the recording appeared in your library.
- ☐ Note anything that went wrong, so next week’s volunteer knows.
Calm Volunteers, Reliable Streams
A good live stream doesn’t depend on who’s on duty. It depends on a setup that’s done once and a live stream checklist that’s followed every time.
Ready to set up your next broadcast? Open Live Streams
Don’t have an account yet? Start your free trial today.